
 Deutsch
Juniper Mist Wi-Fi access points can do all sorts – but essentially they should provide safe and secure Wi-Fi for everyday use. So the question is, how do you set up a Wi-Fi network with Mist? Despite the available range of functions, Wi-Fi setup is surprisingly easy, as the Wi-Fi options are designed to be clear and intuitive.
The guide assumes you already have a Mist account, you have set up an organization and at least one access point, and a location has been assigned.
In our example, a Wi-Fi network already exists to which all employees have access. The network does not have any special settings and the employees access it via a password. An additional guest network is to be set up for visitors. The guest network needs to fulfil a range of criteria to enable the working day to run smoothly and to ensure the security of the network:
- The Wi-Fi network must only use part of the internet connection’s overall available bandwidth, to ensure that company applications are not put at risk.
- Guests should be able to register independently without help from IT staff or the issuing of a password. This means guests should log on via a web portal.
- Wi-Fi access should be time-limited for each guest. After this period, they will have to log on again.
- The Wi-Fi network should only be available during normal office hours.
- The Wi-Fi network should only be available in the part of the building accessible for visitors.
- Guest devices must not be able to access other participants in the network.
With Mist, this comprehensive catalogue of requirements can be realized within minutes. Keep reading to find out how this works in practice. At the end, you will find a compendium with all the options offered by the Mist Wi-Fi interface.
The Wi-Fi overview
The side menu Network – Wi-Fi shows the wireless networks which have already been set up, as well as offering the option of setting up new networks.
As with all Mist overview displays, you can change the information in the overview of the existing networks. To do this, click on the sandwich icon in the upper right corner. Then you can choose which information about the Wi-Fi network should be displayed.
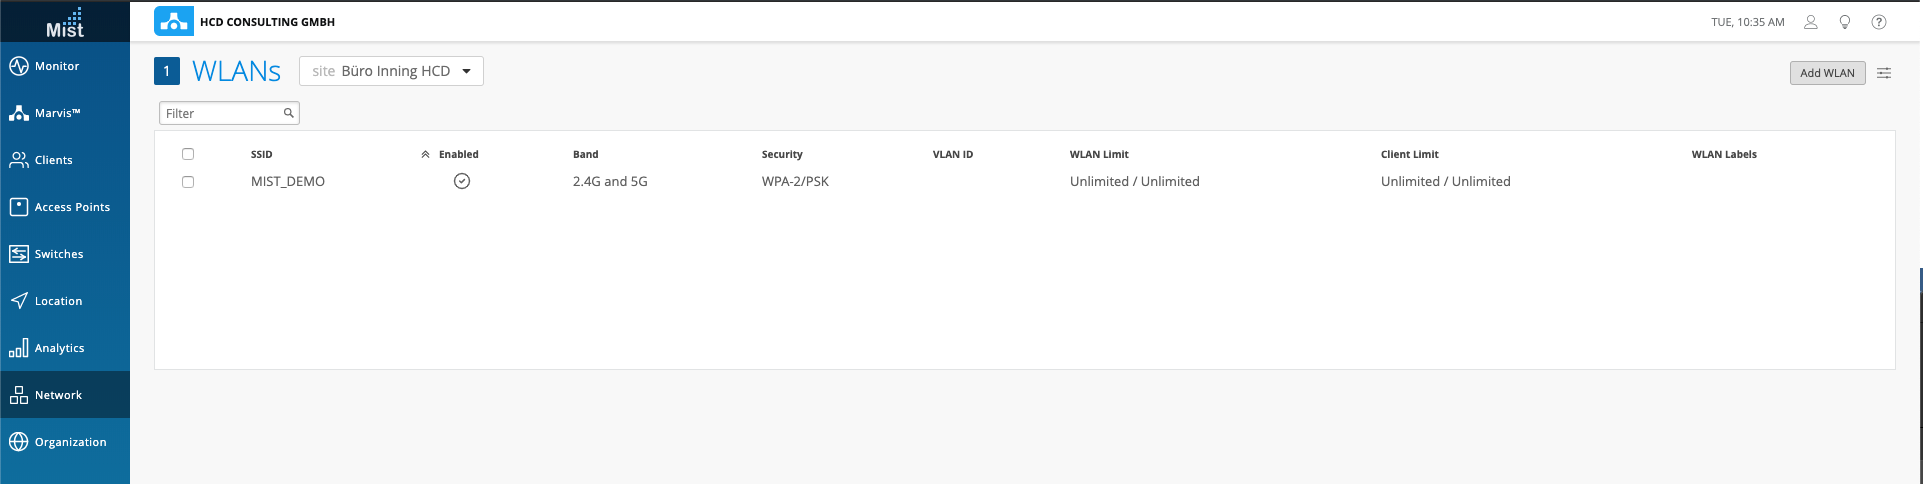
To set up a new network, click the Add Wi-Fi button in the upper right corner.
The configuration menu
To set up the new Wi-Fi, a new page on the dashboard opens, presenting all the configuration options on a single page.

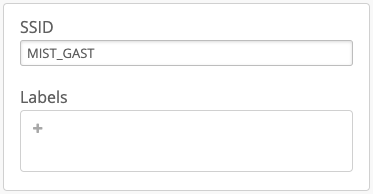
First the SSID for the Wi-Fi is selected. The SSID “Mist_Guest” is used for the guest network. “Guest” is also used as a label. This label can be used later on to define security policies.
Under Wi-Fi Status/Radio Band/Band Steering/Client Inactivity, all options are left on their default settings. The same applies to the Data Rates and the Wi-Fi protocols.
To limit the Wi-Fi bandwidth, check the uplink and downlink boxes in Wi-Fi Rate Limit and enter the desired data rates. Here you can enter a free numerical value and choose between Kbps and Mbps. You can also limit the Per-Client Bandwidth. This is particularly recommended if you are expecting many guests and each guest is to be provided with the same Wi-Fi quality. For our example, we won’t limit the data rates for individual applications.
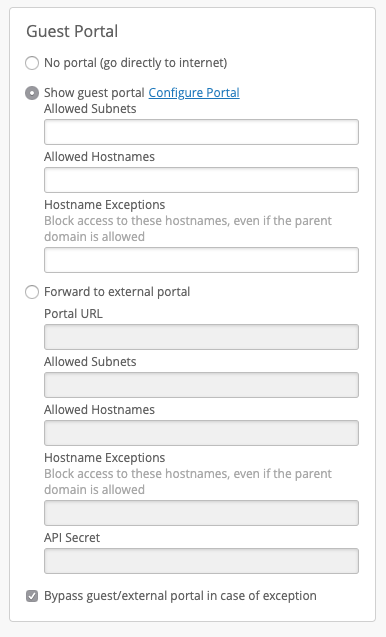
Choose Security Open Access, as the guests should register for the Wi-Fi via an online portal. If a guest logs onto the Wi-Fi, they will be routed directly to the registration portal. It is only possible to use the internet after registering via the guest portal.
No external services are needed to set up the guest portal. Under Guest Portal, activate the option Show guest portal and then click Configure Portal to configure the guest portal. Of course, it is also possible to use an external portal. This can be incorporated using Forward to external portal.
This guest network should be accessible without a password but, at the same time, should not provide unlimited access to the internet. A registration portal is set up to do this. The internet can only be accessed after registration. Details of the guest’s name, e-mail address and company name are compulsory for registration. With the option Authentication code via e-mail, the user will receive a login code which they must enter in the portal. Internet access is then provided for eight hours. All these options can be set via the portal configuration. Additional external services are not required.
Since our Wi-Fi network should only be available in certain areas of the company, assign individual access points to the guest Wi-Fi network under Apply to Access Points. Here you can make the selection using labels or by choosing certain access points.
Under Isolation, check the box prohibit peer-to-peer communication to prevent access to other devices in the network. The options under Filtering can also be used to further increase security. Think carefully here, as these options could also endanger the function of the Wi-Fi network.
Finally, the availability of the Wi-Fi should be limited. The Wi-Fi should not be available outside office hours or at weekends, to prevent potential misuse by third parties. You can enter the desired times for this under SSID Scheduling.
These are all the steps you need to configure the guest Wi-Fi. Apart from the web portal, you can view the entire configuration on a single page. If all the settings are correct, then confirm them by clicking Create in the upper right corner. Now the Wi-Fi is set up and will be available for use in a few minutes. You can make changes at any time via the Wi-Fi menu.
Compendium
SSID & Labels
First of all, you can define the SSID. You can also issue a label. The label is used to form tags or groups, which can be used to create security policies.
Wi-Fi Status / Radio Band / Band Steering / Client Inactivity
You can make initial settings about the Wi-Fi status in the next block.
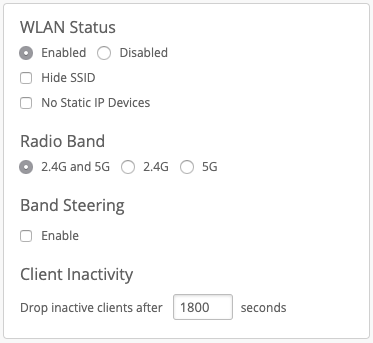
Here you can switch the network on or off (Switch network on/off) and hide the SSID (Hide SSID). The option No Static IP Devices enables you to exclude devices configured with a static IP address and which may therefore lead to network problems in a dynamic system.
You can select the frequencies to be used for the Wi-Fi network under Radio Band. In some situations it may be useful to offer separate 2.4 GHz / 5 GHz networks, because 2.4 GHz offers much higher ranges and 5 GHZ provides better data rates.
Via Band Steering, you can permit the Mist AI to decide for itself which frequency band is used for communication by dual-band capable end devices.
Use Client Inactivity to set how many seconds of inactivity to wait before disconnecting the client from the network. The client must log on again after “waking-up”.
Data Rates
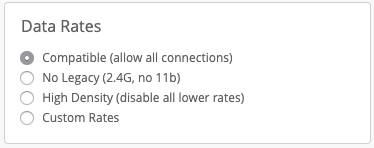
The Data Rates block allows you to choose which data rates should be used. Whether low data rates should be blocked in a wireless network is a matter of debate and depends on the individual case. Mist enables you to make these settings easily according to your wishes.
The standard setting permits all data rates. If No Legacy is selected, devices in the 2.4 GHz frequency range which only meet the 11b standard (and therefore throttle the speed of the entire network) are blocked. The setting High Density blocks all 2.4 GHz clients and clients with poor signal rates. Under Custom Rates you can force or exclude your own data rates in 2.4 GHz and 5 GHz Wi-Fi networks.
Wi-Fi Protocols
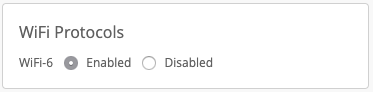
This is where you can switch the support for WiFi 6 on or off.
Wi-Fi Rate Limit / Per-Client Rate Limit / Application Rate Limit
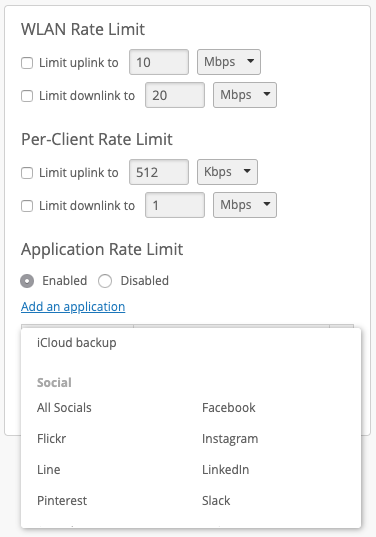
Here you can make a variety of settings to limit the Wi-Fi speed. This could be for the whole Wi-Fi network, individual clients or for certain applications and user groups such as social media. So, for example, you can set up guest networks in such a way that they only receive part of the available bandwidth, and the main network is not affected. In the same way, a limit can be placed on certain applications so that operating system updates or streaming platforms do not affect the overall performance of the network.
Security / Fast Roaming
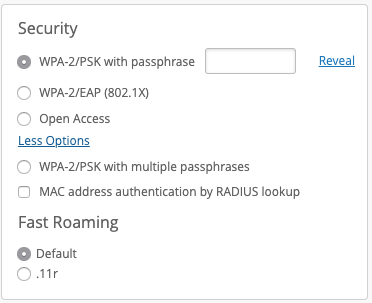
You will find an entire range of authentication options under Security. Regarding encryption, you can only choose between an unencrypted and a WPA-2-encrypted network. You cannot select WEP encryption due to the inherent lack of security of this method. Should a WEP network be absolutely essential, you can ask Mist Support to enable this encryption method for you.
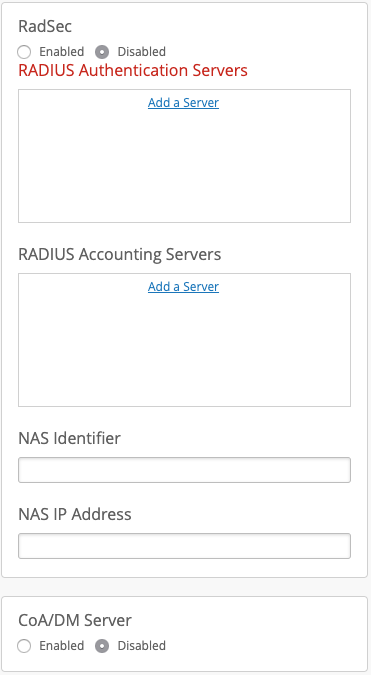
Under Authentication you will find an entire range of options. The most popular variant is of course the password – here referred to as a Passphrase – which for Mist must be between 8 and 64 characters long. You can enable additional options for enterprise solutions with the WPA-2/EAP (802.1X) option. For example, you can use RadSec, RADIUS Accounting Server, NAS Identifier and NAS IP Address as well as CoA/DM Server.
Use Fast Roaming to add the 11r standard, which enables rapid authentication between the APs, enabling better roaming.
VLAN
The VLAN settings change with the authentication methods. You can set up dynamic VLAN in connection with a RADIUS server authentication.
Guest Portal
Here it is easy to set up special authentication methods for guest networks. The option Show guest portal lets you configure a simple portal to welcome your guests and offer them a range of registration options. The portal can be configured according to your wishes and also offers you the option of incorporating other authentication services such as Google, Facebook, Amazon or Microsoft. In addition, you can also set up a password prompt via the portal, or registration codes via e-mail or text message. You can also limit the duration of the guest’s internet access. You can of course also set up an external portal for authentication.
Configuring the guest portal
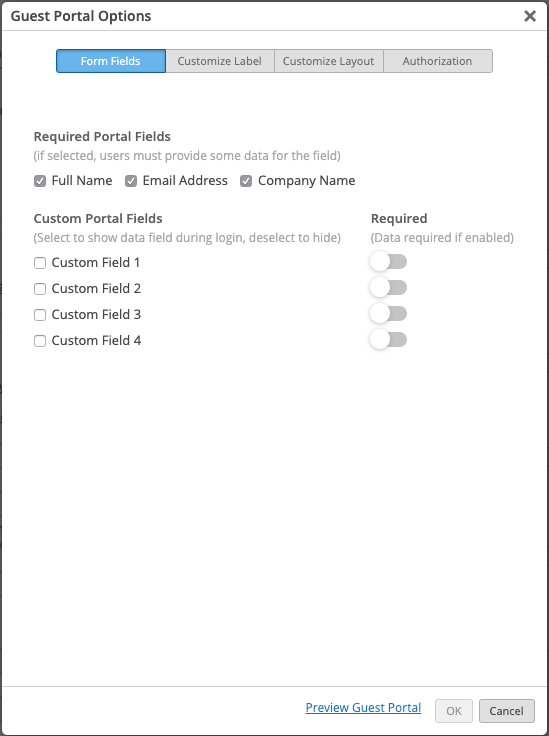
Form Fields
Configuring the portal is easy. You can choose which information to demand for the registration. In addition to the name, e-mail address and company name, you can also ask for additional data which is defined using “Customize Label”.
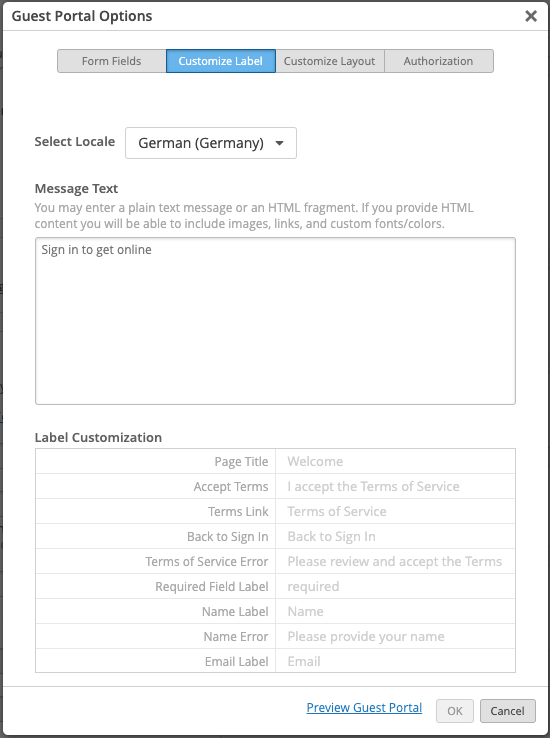
Customize Label
Use this menu item to set the portal language to one which is different to the Access Points’ default setting. “Message Text” allows you to change the instructions or greetings. “Label Customization” gives you the option of changing all the text modules for the portal. Mist does not yet offer any predefined labels in German here.
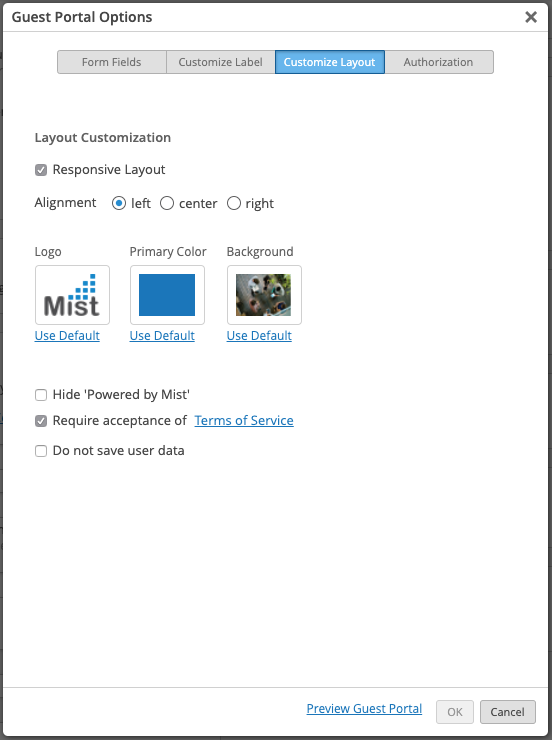
Customize Layout
Use this menu item to customize the portal design. You can leave out the Mist logos and adapt the corporate design.
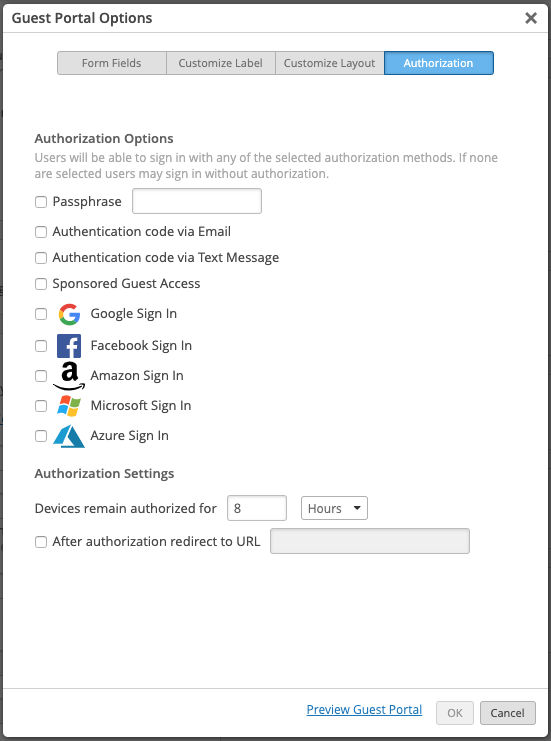
Authorization
Use this menu item to select the authentication. As well as a password, you can automatically send access codes from the Mist Dashboard or incorporate an external service provider. You can also set how long the access is valid for.
Apply to Access Points

Here you can choose which Access Points the Wi-Fi network is allowed to offer. You can choose between all access points, APs with a certain label and specific APs. For example, it makes sense to only provide the guest Wi-Fi network with access points located in places where visitors are.
Isolation / Filtering
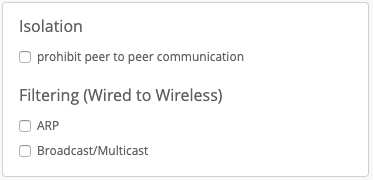
These two options are for security. Use Isolation and Filtering to prevent devices from communicating with each other. However, as these options may impact the smooth functioning of the network, a cautious approach is recommended here.
Custom Forwarding
Use this option to force traffic to be routed through precisely-specified Ethernet ports, instead of using the standard Ethernet ports. You can also choose to use an L2TPv3 tunnel.
SSID Scheduling
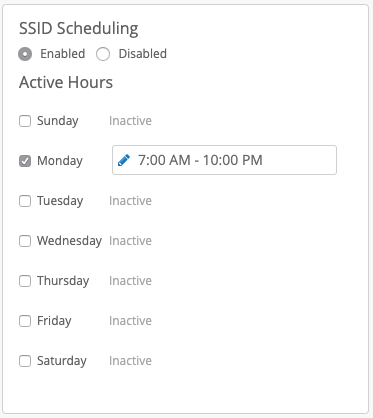
Use SSID Scheduling to select on what days and at what times the Wi-Fi network is to be available.
QoS Priority
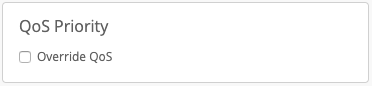
This option allows you to overwrite the general Quality of Service settings for this Wi-Fi network and set them according to the criteria “best effort”, “background”, “video” or “voice”.
AirWatch
Use this menu item to add the mobile device management tool “AirWatch” for the Wi-Fi.

Questions?
Just ask!
I am Alexander Zagler from the HCD sales team. I will be happy to advise you or assist you with any questions. You can phone me on +49 89 215 36 92-0 or reach me using our contact form.
Contact us